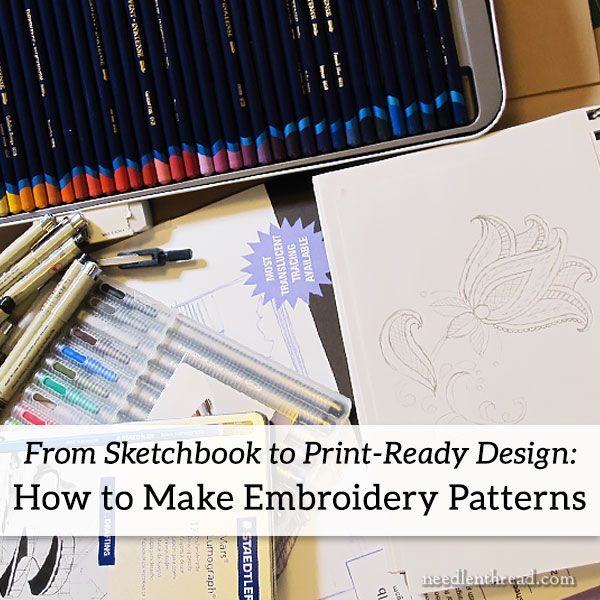
how to make hand embroidery designs step by step
Over the years, I've had many, many queries about how to make hand embroidery patterns.
The question of how to make embroidery patterns isn't usually directed to the drawing or doodling part that's done with a pencil, but rather how to take a sketch, painting, photo, or doodle and transform it into a clean line drawing that can be enlarged or reduced in size, printed, and used as a pattern for stitching.
So, today, let's chat about a technical topic that's somewhat related to embroidery, even though it doesn't have to do with the actual Stitching of Things.
We'll look at what you need to know to create a line drawing that's smooth, scalable, and prints a clear, precise line drawing suitable for an embroidery pattern.
If you're drawing your own patterns for your own embroidery, you certainly do not have to go all-out technical in the production of them. A design that you've drawn with pencil on a piece of a paper works just fine!
In fact, I think you can get much more creative in planning a design from absolute scratch, using a pencil and perhaps some watercolors or colored pencils. A good fine-tipped artist's pen for the final line drawing will give you a decent image to transfer. If you're not computer inclined, or you have no desire to mess with the learning curve involved in graphics programs, then don't sweat it! Use pencil, paper, and pen.
But if you want to create a printable, scalable, smooth drawing to use as a pattern – maybe you want to sell your patterns or include them in kits or what-have-you – then it's helpful to produce what's called a vector image from your drawing.
I'm not going to take you step-by-step through creating vector images from drawings. Instead, I'm going to talk about my own process, point you in the right direction for the tools you'll need, and share some tips on what you really need to learn if you want to create vectors and things to avoid if you want to be efficient about it.
What Does it Take to Draw an Embroidery Pattern?
If you believe that you're incapable of drawing your own patterns because you're not an "artist," I think you'd be surprised! If you can doodle, you can make up your own pattern.
Embroidery patterns for me come about primarily as a result of doodling in a sketchbook (or sometimes, even on a paper napkin when sitting at the table). I like to doodle, but I'd never call myself an "artist." I don't really draw in a highly artistic way, especially when it comes to realistic human forms or realistic animals. Flowers, inanimate objects, scenery, and stylized designs are easier for me. In fact, if I had to sketch the person sitting across from me drinking coffee, he'd come out looking like this:

(…which, weirdly enough, isn't all that bad of a rendition…!)
Seriously, though, if you can doodle, you can draw your own original pattern. If you can't doodle, but you can photograph something – like a scene or a flower or a bug that you like – then you can trace that photograph to make a design that's stitchable.
Software
For software, I use Adobe products. For image and photo editing, I use Photoshop. For vector images, I use Illustrator (and I also use Inkscape – more on that below), and for publishing, I use InDesign.
I like Adobe's products because I'm used to them and can use them efficiently. However, they're expensive, and if you're just starting out, I'd go with any of several free or lower-priced (one time purchase) options. For photo editing, check out Gimp (PC or Mac – free). If you use a Mac, you can try Pixelmator (about $30) or Affinity Photo (PC or Mac – about $50). For vector images, I'd go for Inkscape. It's made for PC, but will work on a Mac if you install XQuartz as well. Inkscape is free and it's relatively easy to learn.
You can google any of the above. All of them have good reviews, and you can find plenty of free tutorials on how to use them online.
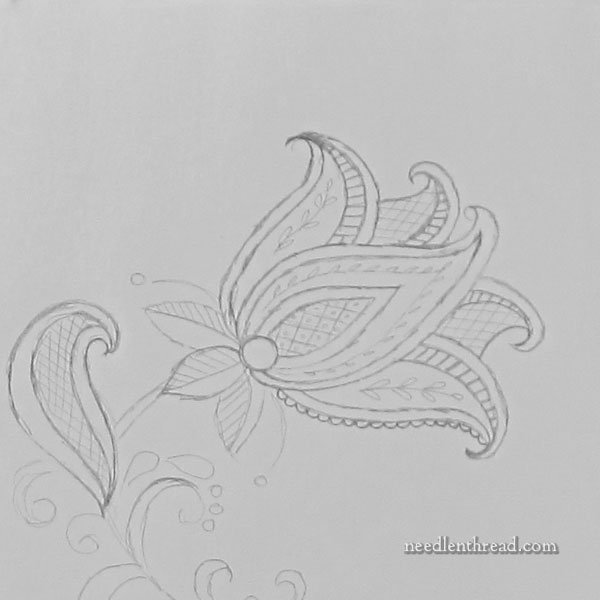
Here you have a really hazy doodle of something that could eventually turn into some kind of embroidery pattern if I were inclined to finish it. It's just something I was playing around with one day while doodling in a sketchbook. For our purposes here, it will suffice.
Trace it with a Pen
When it's time to turn a drawing into an embroidery pattern, the first thing I do (after drawing the thing to my satisfaction) is trace over all the main lines with a fine-tipped micron art pen, in black. If you're using a photo of something to make a pattern, use tracing paper and trace the main lines of whatever it is you want to stitch.
Tracing your sketch with a pen gives a clearer scan to work from.
Remember when tracing that, for an embroidery pattern, you're really only looking for the main lines of the thing and perhaps some directional lines to guide stitching on filled areas. You don't need to trace every detail! Think in terms of what you would need, as a stitcher, on the fabric in front of you in order to stitch your masterpiece. The fewer details you can get away with, the better! Remember, you still have to transfer the design to fabric, and your design is too detailed, transferring can end up being confusing and tedious!
So, for example, if you're creating a vector line drawing of a bird to needlepaint, you're not going to include every feather stroke on that bird. You just want to include the main outline of the bird and the lines that indicate some kind of change in the pattern or color while stitching.
Scan It
Then, I scan the drawing and save it to my computer. It comes out as a jpg on my scanner, so I convert it to a gif in Photoshop.
Once you have a gif, you can import it into whatever program you're going to use to create the vector image. For the sake of easy discussion, I'm talking as if using Inkscape, but if you have Adobe Illustrator or you already use their products, it's pretty much the same approach. Illustrator has a steeper learning curve, though, if you aren't already familiar with their products.
Things You Need to Know
The point of this article is not to teach you how to use a graphics program to create a vector image. That subject could make up a whole class series! Instead, here are the highlights of what you should look for as far as online tutorials go, or what you need to know how to do.
1. In order to start manually tracing the design, you should know how to import a gif, create new layers, change layer opacity, draw a straight line, adjust the line using the cursor and nodes, how to add nodes, delete nodes, and change node types. It's also helpful, if your design calls for it, to know how to create a spiral curve that you can adjust.
2. To make the workflow quicker, you should know how to group lines or elements (or combine) and how to ungroup or break them apart, how to combine two nodes into one, how to break a path, how to add a new segment between nodes, how to cut segments from a line, how to duplicate, rotate, and flip elements. You should also know how to copy and paste elements from one file to another. You'll also want to know how to change object to path and, for parallel lines, how to change stroke to path.
3. To keep your working vector organized, it's helpful to know how to handle layers – how to raise and lower objects from one layer to another, how to merge layers, how to lock layers, how to rename layers, and how to hide layers when you need to.
4. To create symmetrical elements, it's good to know how to draw shapes with various shape tools (circles, squares) and how to constrain proportions when enlarging or reducing a shape (or a whole grouping of lines). It's also helpful to know how to create a one pixel (or larger) dot, for indication where beads or French knots go.
5. To ensure consistency in the whole design and to adjust the look of lines and elements, you should know how to adjust fill and stroke.
6. Finally, you should know how to size your finished design in inches or centimeters with constrained proportions (height and width), and how to export or save the image in various formats, including EPS and PDF. EPS files can be used to make jpeg images of your designs. And you'll use the PDF for efficient printing at the actual size.
Things You Don't Need to Know
The six points above are really all you need to know to create a decent vector image from a drawing. What you don't need to know is how to use the auto trace feature. The auto trace feature rarely produces a vector that you can use immediately. Auto-traced elements end up requiring a ton of editing, and, since they're often overloaded with unnecessary nodes, this can be a real pain.
It's more efficient just to draw your own image using lines, using as few nodes as possible, and then manually adjust the nodes.
The Vector Advantage
Is it worth taking the time to change a sketch into a vector image? Well, if you're the only one who will ever see your image and you're doing a one-off project, then I would say no, absolutely not! But if you want the design for circulation, then yes, it's worth learning how to create a vector image.
There are several advantages to using vector images when creating embroidery patterns, but the main one, in my mind, is that the finished product – the line drawing you create – is scalable. It can be enlarged and reduced practically ad infinitum, maintaining an absolutely smooth line without pixilation.
So, from the photo of the sketch above, this is the vector image I created:
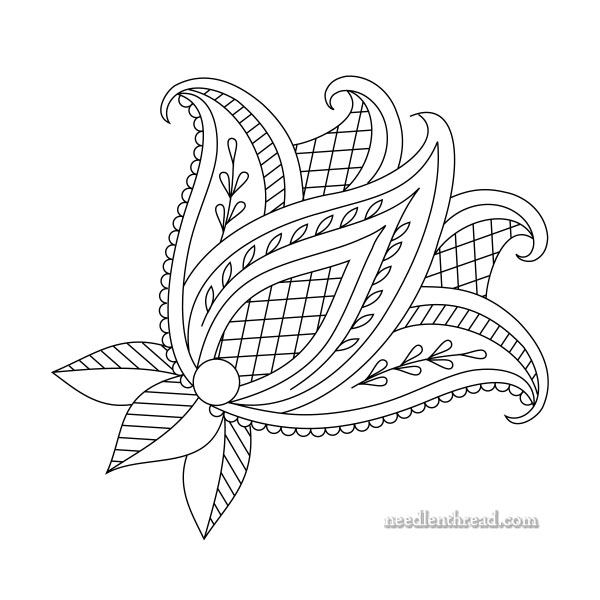
You can see that the design is made up of smooth lines without pixelation.
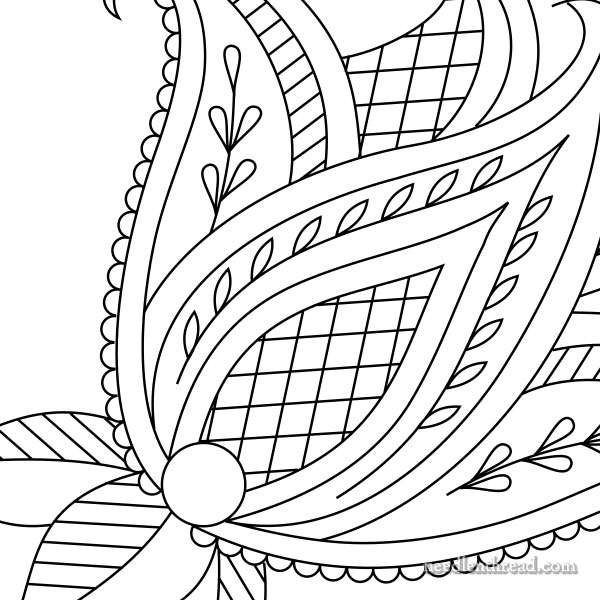
If I enlarge the design on my computer, it's still smooth.
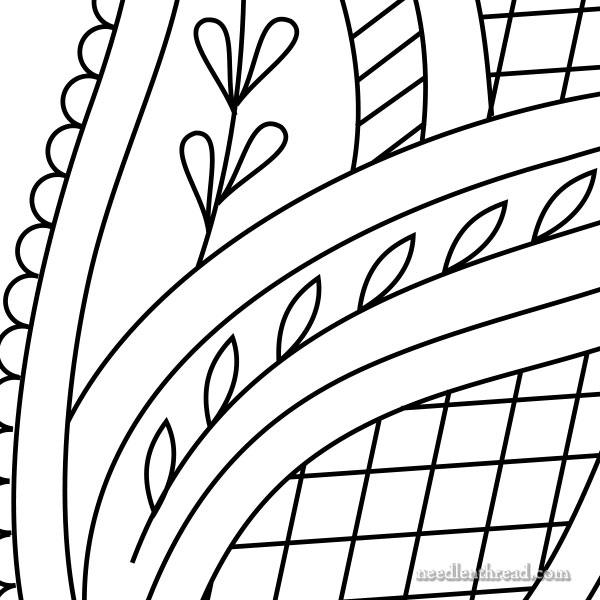
I could keep enlarging it on my computer and I'm still not going to see pixelation.
(Since the images above that you see online are jpegs, if you try enlarging them too much or you zoom in on them, you'll see pixelation because of the jpeg format. On the actual vector image and on the PDF, this doesn't happen.)
Over to You!
I hope this helps answer the many questions I've received on the subject of how to make embroidery patterns for printing. If you have other questions, feel free to ask or to join in the conversation below!
Enjoy the weekend!
how to make hand embroidery designs step by step
Source: https://www.needlenthread.com/2017/08/how-to-make-printable-hand-embroidery-patterns.html